


I don’t think I’ve met a single person who doesn’t like cheesecake. There is just something so perfect about a layered cheesecake; a delicious crumb base, a soft, rich filling, and a delicious fruity top. These are HEALTHY versions of the cheesecake we all know and love, made with wholesome, natural ingredients!
What better way to show your love and appreciation to your mum this Mother’s Day than with these decadent, vegan, gluten free mini blueberry cheesecakes. These may look like your spent hours in the kitchen slaving away, but these are so simple to make, and the freezer does the work for you so these can be made ahead of time!
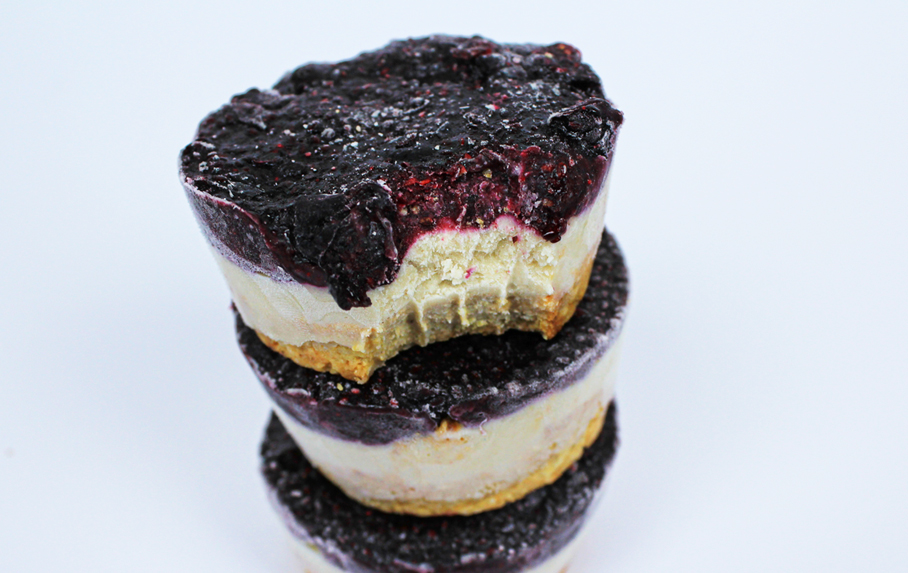
MINI VEGAN BLUEBERRY CHEESECAKE
- Nutritional Breakdown: per portion (whole recipe)
(g)
- Calories: 414 (2070)
- Carbs: 131.2 (156)
- Fat: 27.7 (138.5)
- Protein: 14.1 (70.5)
- Sodium: 0 (0.02)
- Sugar: 12.4 (62)
- Preparation time: 30 minutes
Cooking time: 20 minutes
Chilling time: 2-3 hours
Makes 5 mini cheesecakes
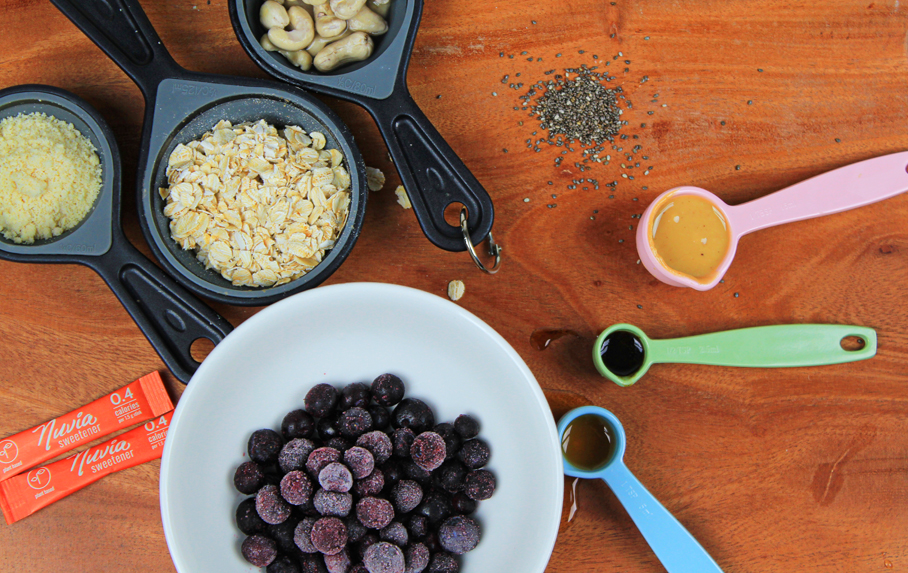
INGREDIENTS
- CRUST (bottom layer)
- ½ cup gluten free oats
- ½ cup almond meal
- ¼ tsp baking soda
- 1.5 tsp Nuvia natural sweetener
- 2 tbs natural smooth peanut butter
- 2 tbs plant milk (I used Bonsoy)
- ¼ tsp salt
- CHEESECAKE FILLING (middle layer)
- 1.5 cups soaked cashews (soaked in warm water for 2 hours minimum)
- ½ cups water
- ½ tsp Nuvia natural sweetener
- 1.5 tbs maple syrup
- 1 tsp vanilla extract
- ¼ tsp salt
- BLUEBERRY GLAZE (top layer)
- ¾ cup blueberries (fresh or frozen is fine)
- 1.5 tbs chia seeds
- 1 tbs maple syrup
METHOD
- 1. Preheat oven to 180 C fan forced.
- 2. Combine all crust ingredients. Press firmly into silicon muffin pan and bake for 20 mins or until golden brown.
- 3. Allow to cool whilst preparing filling.
- 4. Prepare filling by adding all filling ingredients in a high-speed blender until thick and creamy.
- 5. Disperse evenly on top of cooled crust layer and set in the freezer.
- 6. Whilst setting, prepare glaze.
- 7. Add all glaze ingredients to a small pot and bring to boil.
- 8. Use a fork to gently mash the blueberries. The mixture should thicken.
- 9. Allow to sit for 15 minutes to thicken further.
- 10. Add to set cheesecakes and put back in freezer for minimum 2 hours.
- 11. Once set, carefully pop cheesecakes out of the moulds.
TIPS AND TWEAKS
Store in airtight container in freezer for up to 1 week.
These cheesecakes get quite hard once they’ve been in the freezer for over 24 hours, so I would suggest defrosting them in the fridge before serving them.
Perfect as is, although I would highly recommend serving them with some extra blueberries, coconut flakes (as featured), or topped with coconut yoghurt or peanut butter for extra creaminess.
As these cheesecakes are not overly sweet, if you prefer sweeter desserts, you could add more Nuvia sweetener or maple to the recipe.
I’ve also dried this recipe with raspberries instead of blueberries – they work great too! And if you’re a lemon fan, you could add lemon rind to your filling or glaze!
